Having a broken kitchen cabinet drawer is not only an eyesore but gets to be frustrating to deal with over time as well. Fortunately, replacing a broken kitchen drawer doesn’t have to be difficult, especially with a little DIY direction.
Your Guide to Replacing Cabinet Drawers
You can replace your kitchen drawers in a few easy steps, making it an excellent project for a weekend afternoon. It’s quick to complete and generally doesn’t require a large investment, either. Follow these simple steps to learn how to install sliding drawers in kitchen cabinets, and you can finally cross one item off your to-do list.
Step 1: Choose the Right Material and Hardware for Your Drawer Box
Replacing cabinet drawers gives you an opportunity to upgrade the materials and hardware used in your kitchen. As far as materials go, you have several options to choose from, including hardwood, engineered wood, particleboard, MDF, and veneered plywood. Take a look at some of the advantages of each material.
Finding the best material for replacement cabinet drawers
Generally speaking, hardwood is one of the best choices for cabinet drawer fronts and sides. Hardwood drawers are often constructed using a technique called dovetail joinery. This assembly method yields strong, durable, long-lasting joints that won’t loosen or separate over time, resulting in heavy-duty cabinetry that can hold up against daily use.
That said, there are more budget-friendly alternatives to hardwood drawers. Engineered woods are a popular option. Veneered plywood, particleboard, and medium-density fiberboard (MDF) are available at most lumber yards.
Regardless of the materials used for the drawer box, plywood is recommended for the bottom section of the drawer because it will not swell or shrink.
Choosing the right hardware for your kitchen cabinet drawers
Choosing slides for kitchen cabinet drawers requires a choice between style and simplicity. Since under-mount slides are not visible when the drawer is open, they need less side clearance and a wider cabinet. Bottom-mount slides align the drawer box so it is easier to install, but they are visible on the side edges.
Either way, look for heavy-duty materials that contain ball bearings or smooth-gliding rollers.
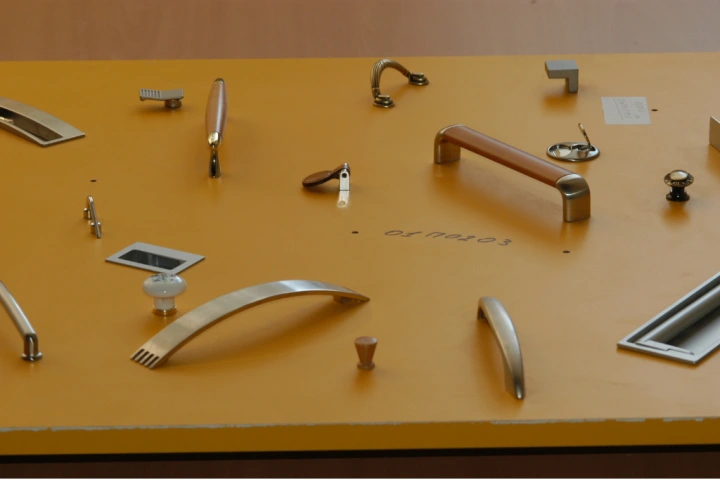
As for accessory hardware, it is considerably more comfortable to open a heavy drawer with a horizontal pull. Feel free to get creative with the finish and shape! Let your kitchen design guide you: Are the cabinets curved or square? Are lighting fixtures chrome or brushed nickel? When shopping, choose hardware that creates a cohesive look and aligns with your personal taste.
Step 2: Gather Your Tools and Materials
Get started by gathering a few necessary tools and materials. Alongside a new drawer box, fixtures, and sliders, you’ll need the following.
Tools:
- Tape measure
- Drill and drill bit
Materials:
- Plywood
- Wood glue or staples
- Clamps
- Double-sided tape
- Screws
- Drawer dividers or organizers
Once you’ve got everything you need, it’s time to get started.
Step 3: Measure for the Perfect Fit
Measuring is a crucial step in the drawer replacement process. Adding a new cabinet face is one thing, but replacing the entire drawer box requires a few extra steps to make sure you get the most accurate measurements.
One thing to note: You don’t need to measure the drawer front while replacing kitchen drawer boxes. But you will need to measure all the outside dimensions. Take a look at how to measure based on the type of glides installed in your cabinets.
Measuring with side-mounted glides:
- Measure the frame-to-frame cabinet opening width. Subtract 1” to account for both side-mounted glides. You may need to subtract more if you have atypical or custom glides.
- Measure the frame-to-frame cabinet opening height. Subtract at least 1/2” for drawer clearance. Round down to the nearest 1/2” (3 3/4" becomes 3 1/2").
- Calculate depth by subtracting 1" from the length of the side-mounted drawer glides. For example, 21” glides will need a 20” deep drawer box.
- Double-check the depth of your cabinet. The typical kitchen base cabinet depth is 24”, but gas and water pipes can change that number.
Measuring with under-mount glides:
- Measure the frame-to-frame cabinet opening width. Subtract 3/8” for side clearance.
- Measure the frame-to-frame cabinet opening height. Subtract 3/4”, then round down to the nearest 1/2". Most drawer boxes are only sold in 1/2" heights.
- The drawer box depth is the same length as the under-mount drawer glide.
- Look for the "notch and bore" option for drawer boxes with under-mount slides.
After you get your measurements, you have two options: Find a replacement or get a custom drawer. If your cabinets are fairly new, you may have an easier time finding a replacement that works with your glide system. However, if you plan to repair vintage or custom cabinets, you may consider contacting a local cabinet maker or a custom storage solution team like ShelfGenie® to create drawers that fit your cabinets’ specifications.
Step 4: Replace the Drawer Bottom
Next, it’s time to replace the bottom panel of your drawer.
- Measure the dimensions of your drawer’s existing bottom panel.
- Cut your plywood to fit.
- Fit the plywood into the grooves of the drawer box to check for fit.
- Adjust your cut or cut a new panel as needed, then repeat Step 3.
- After confirming that the new panel fits, apply a thin layer of wood glue on all sides of the new panel, using clamps to hold it in place until the glue dries. If your drawer boxes don’t have slots or grooves, you can staple the plywood panel in place.
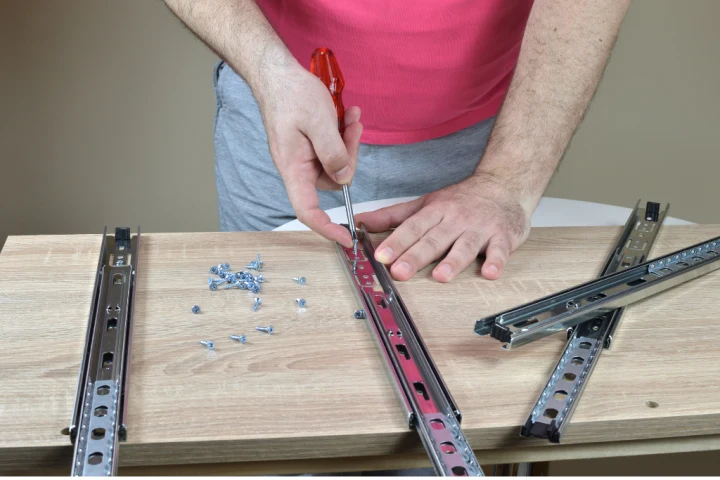
Step 5: Install the Drawer Slides
When installing replacement drawer slides, you have two options: find a set that matches your existing slides or choose a new slide system.
When buying existing slides, you can generally use a generic, epoxy-coated system. Just make sure the slides align with the depth of your drawer box. Then, follow the directions to replace your old slides with new ones.
Changing your slide style is simple, too. Remove your existing slides, then follow the product directions on your new slides to give the drawers the look and functionality you want.
You may even consider custom options, like ShelfGenie’s Pull-Out drawer systems, to personalize your cabinetry and make it easier to access the back of your drawers.
Step 6: Add Dividers for Organization

Don’t waste time in your kitchen looking for everything you need. Nobody wants to burn dinner because they can’t find a spatula. Cabinet dividers are available at any home goods store, and they come in many different styles.
But why settle for one-size-fits-all cabinetry when you can customize cabinets to your every need? Custom inserts organize silverware, cooking utensils, and oversized tools, and drawer-in-a-drawer solutions maximize cabinet space. Keep what you need within reach and save the rest of the drawer for storage.
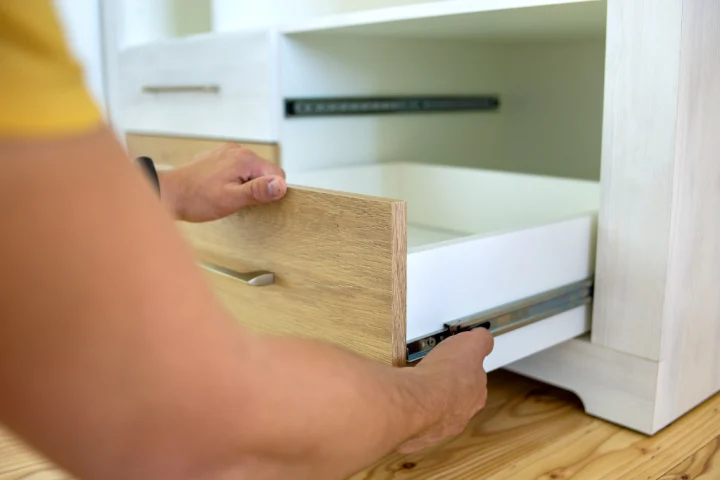
Step 7: Install the New Drawer Box
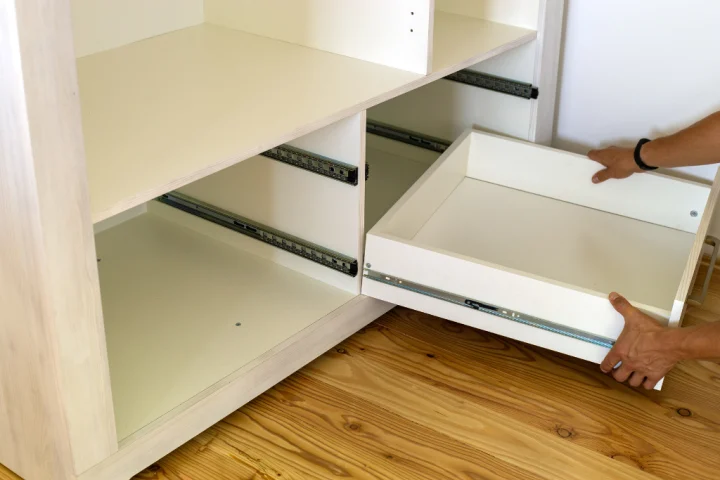
Once the sliders are on, test the new drawer box to see if it rolls without trouble. Then, follow these steps to complete your installation.
- Use double-sided tape to adhere the drawer front to the box.
- Make sure the drawer front is centered and all surrounding gaps are evenly spaced.
- Screw through the drawer box from the inside. Use a minimum of two screws.
- Slide your new cabinet drawer into its frame with ease.
Alternatives to DIY Kitchen Cabinet Drawer Replacement
Replacing a single, broken kitchen cabinet drawer may be an easy afternoon DIY activity. But if your cabinets have become an eyesore or you’re just ready to refresh your kitchen, you may consider another option, like custom cabinets and drawers from ShelfGenie.
Thanks to our three-step design process, we can tailor our kitchen storage solutions to suit your needs. Our experienced design and installation team offers completely customized, new cabinets or fully extendable Pull-Out shelving, organizers, and dividers retrofitted to work with your existing cabinets. We even back our work with the Neighborly Done Right Promise™ to ensure your satisfaction.
Upgrade Your Kitchen With ShelfGenie
Ready to upgrade your kitchen and say goodbye to broken drawers and inadequate storage for good? ShelfGenie can help. Find a local ShelfGenie near you, or book a free, in-home consultation online.
This article is intended for general informational purposes only and may not be applicable to every situation. You are responsible for determining the proper course of action for your home and property. Shelf Genie is not responsible for any damages that occur as a result of this blog content or your actions. For the most accurate guidance, contact your local Shelf Genie location for a comprehensive, on-site assessment.